In this step by step guide for beginners, You will learn how to use WordPress to create a website or blog.
In this ultimate guide, I have tried to explain everything you need to build websites with WordPress, Here is the outline for this in-depth guide, so you can quickly move to any section of this WordPress guide.
- 1. What is WordPress?
- 2. What you can do with WordPress?
- 3. WordPress.org vs WordrPress.com
- 4. How to use the .com version of WordPress?
- 5. How to use the .org version of WordPress?
- 6. Get Super-fast Hosting to use WordPress
- 7. How to install WordPress?
- 8. How to Set up a new WordPress site
- 9. WordPress Themes?
- 10. WordPress plugins?
- 11. Posts and Pages in WordPress
- 12. How to write a blog post and page in WordPress?
- 13. Pages in WordPress
- 14. How to Create Menus in WordPress?
- 15. How to Create a Static Front Page in WordPress?
- 16. Turn Basic WordPress Installation into a powerful website with Plugins
- 17. How to Create different types of websites with WordPress?
- Final Words
1. What is WordPress?

WordPress was started as a blogging tool back in 2003 later it became very popular content management systems to build different types of websites and blogs. Now it has become the most widely used publishing platform in the world.
Million of websites and blogs has been created with WordPress. Google, Microsoft, Sony, Samsung and many other companies are using WordPress for their different projects.
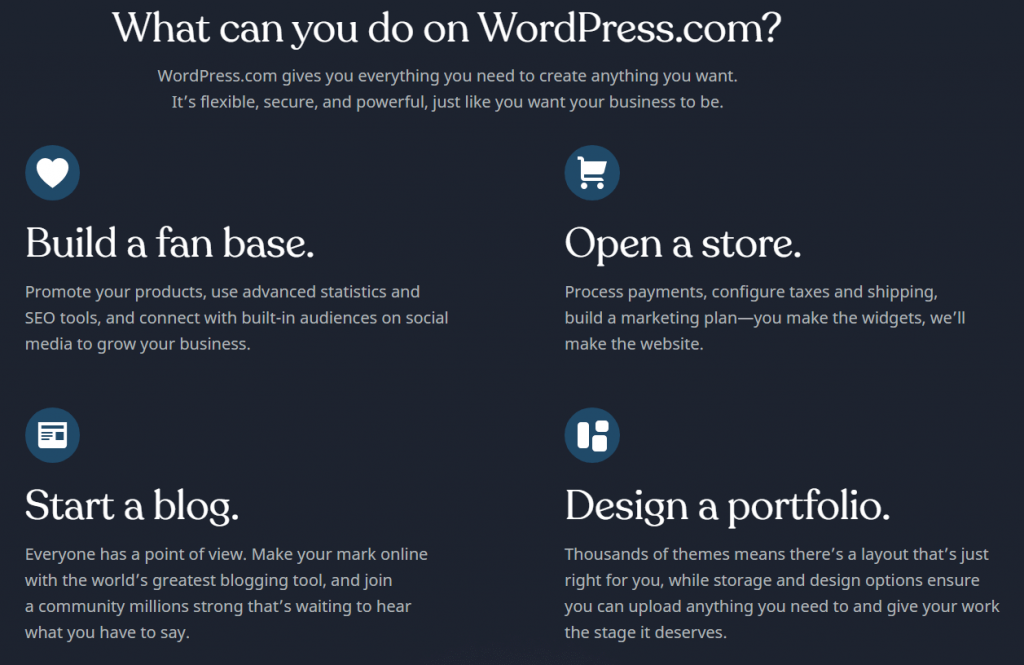
2. What you can do with WordPress?
Basically, WordPress is a publishing platform, with the basic installation of WordPress, You will be able to publish posts on your blog and you can publish pages to setup a static website.
Plugins: But with thousands of free and premium plugins, You can add the additional functionality to your WordPress installation.
Themes: are used to change the design and functionality of WordPress. A theme can be very simple with few options only, or an advanced theme can turn simple WordPress installation into a powerful blog or website.
You can use WordPress to build any type of blog from personal to business to a fashion blog.
Or WordPress can be used to create so many different type websites including business, ecommerce, online stores, reviews sites, social networking, Portfolios, Job boards, business directory, Q&A ’s, discussion forums, and many other types of websites.
You can read 35+ Type Of Websites You Can Create With WordPress to learn more.
3. WordPress.org vs WordrPress.com
There are 2 ways to get started with WordPress.
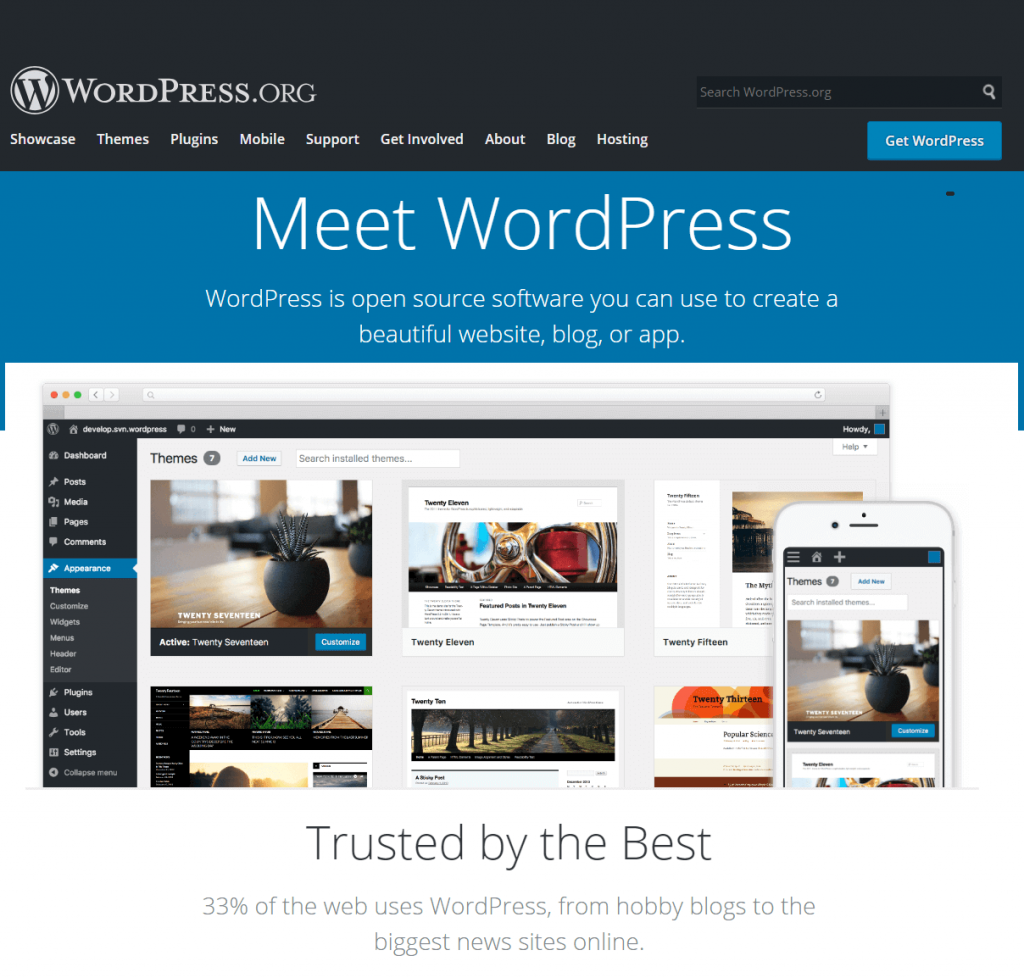
WordPress.org: From this website, You can download the WordPress CMS. You get full control over your website. No limitations at all. You control everything. This setup is called self-hosting WordPress.
Although WordPress is free to download and use, you will have to pay for the domain name (e.g yoursitte.com) and hosting service.
WordPress.com: is a website built with WordPress CMS and you can create personal or business blogs, and websites. It has many limitations. Getting started is free but you can unlock additional features by upgrading to paid plans.
4. How to use WordPress: The .com version
WordPress.com allows you to create 6 different types of websites without any technical knowledge. You just need to choose the type of website you want to create and WordPress will do the rest.
With WordPress.com, You can create Blogs, Personal and Business Sites, Portfolios, and Online Stores.
Just visit WordPress.com, and scroll down the page to read about all the features and plans.
You have the following options to get started
4.1 Create a free site with WordPress.com
A free WordPress.com site includes a WordPress.com subdomain e.g yourblog.wordpress.com, community support, dozens of free themes, basic design customization, and more.
If you start with a free plan, you can upgrade to premium plan later to unlock additional features such as custom .com. .org, .blog domain and audio, video hosting.
4.2 Create Blogs and personal sites with WordPress.com
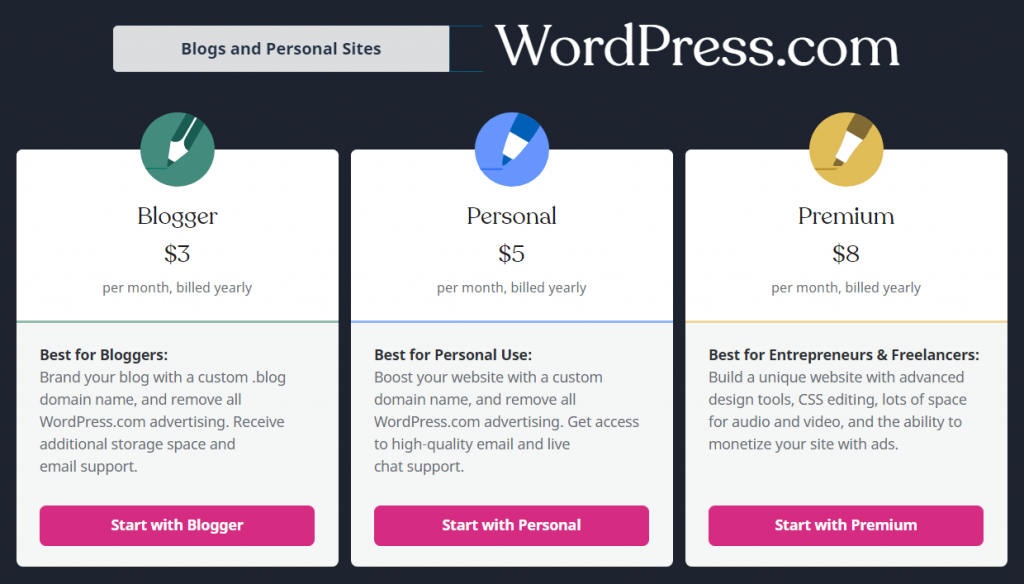
If you want to use your custom domain name such as example.com, you can choose one of the following plans. As you can see, all plans are very affordable, you don’t need to pay a huge amount.
- Blogger $3/month: With WordPress.com Blogger plan, You can choose a custom .blog domain name, and remove all WordPress.com advertising.
- Personal $5/month: You can get a custom .com, .org domain name.
- Premium $8/month: allows you to setup a unique website with advanced design tools, CSS editing, lots of space for audio and video, and the ability to monetize your site with ads.
4.3 Create Business websites and online stores with WordPress.com
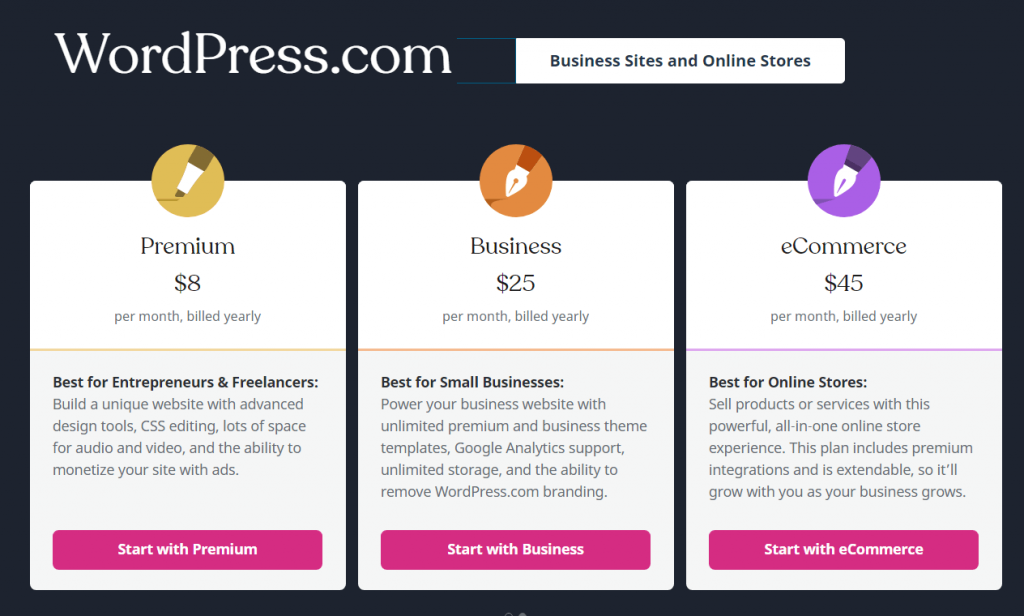
Business plans are starting at $8/month. These plans are great to create unique websites with advanced design tools, CSS editing, lots of space for audio and video, and the ability to monetize your site with ads.
The monetization features allow you to make money from your websites by displaying ads
Even though we have a lot of ecommerce plugins to setup online stores with WordPress but as a beginner, it won’t be easy for you to setup all the things. Payment processing, tax settings, and many other features are an essential part of online stores.
So, You can set up online stores with WordPress.com eCommerce plan. You can easily start selling products or services with this powerful, all‑in‑one online store experience.
These business plans include premium integrations and are extendable, so they’ll grow with you as your business grows.
- Premium $8/month
- Business $25/month
- eCommerce $45/month
Visit WordPress.com and get started with your favorite plan. If you don’t have an account, You can create one.
Complete the signup process and login to your WordPress.com account to start creating and publish content on your site.
5. How to use the .org version of WordPress
In this article, I am going to explain how you can use WordPress as a self-hosted content management system and .com version.
Getting started with both versions is simple and easy. If you want to start free, go ahead and create a free website with WordPress.com
If you need full control over your website, let’s start with the self-hosted version of WordPress.
Here are the basic steps to set up a website with .org version of WordPress.
- Register a domain name
- Get WordPress hosting
- Install WordPress manually
- Choose a Host with Pre-installed WordPress
- Start creating and publishing content
5.1 Register Domain Name with Namecheap.com
First of all, You need to register a domain name for your blog or website, so other people on the internet can access your website.
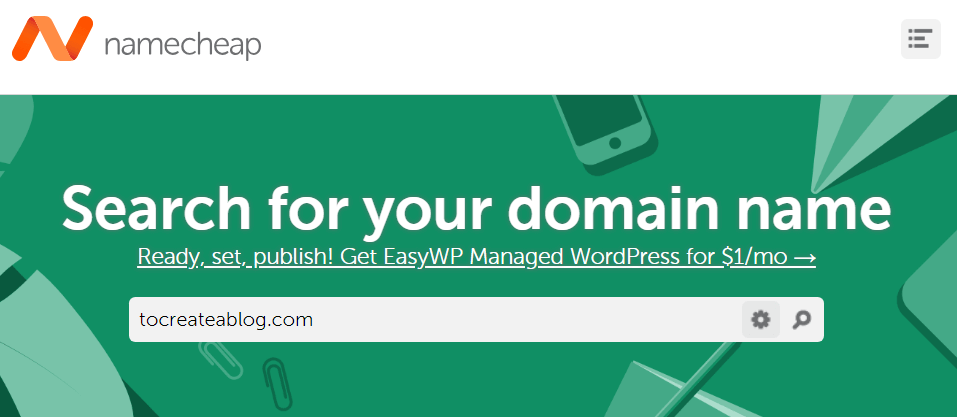
The domain name is address for your website.
You can not buy a Domain name, you can only register it for a fixed period of time. Namecheap a very popular domain name registrar allows you to register a domain from 1-10 years.
If you forget to renew your domain name, other people can register our domain name.
Normally a Domain name costs $8.88/Year at Namecheap but for premium domain names, companies can charge thousands of dollars as well.
But don’t worry, you don’t need to pay $1000’s. Go to NameCheap.com and type your desired domain name in the search box. If it is available, register it for your desired duration. Try to register it for at least 5 years.
SSL certificate: is highly recommended. Have you ever seen a small green icon before the domain name in the browser address bar?. This is because of the SSL certificate.
Domain name is great for Search Engine Optimization and Security. AT Namecheap, You can secure your site with PositiveSSL for just $1.99 for the first year.
6. Get Super-fast Hosting to use WordPress
A hosting company gives you some online storage, where you can upload your website files and install website scripts.
There is a different type of hosting plans available. Shared, managed, VPS are few types of hosting.
Shared and Managed WordPress hosting is very popular.
6.1 Shared WordPress Hosting
is very affordable but your website is hosted with many other websites on the same server. So you can see downtimes on your website. Downtime means people won’t be able to access your website for minutes or in the worst case for hours.
You can get shared hosting from the following popular hosting providers.
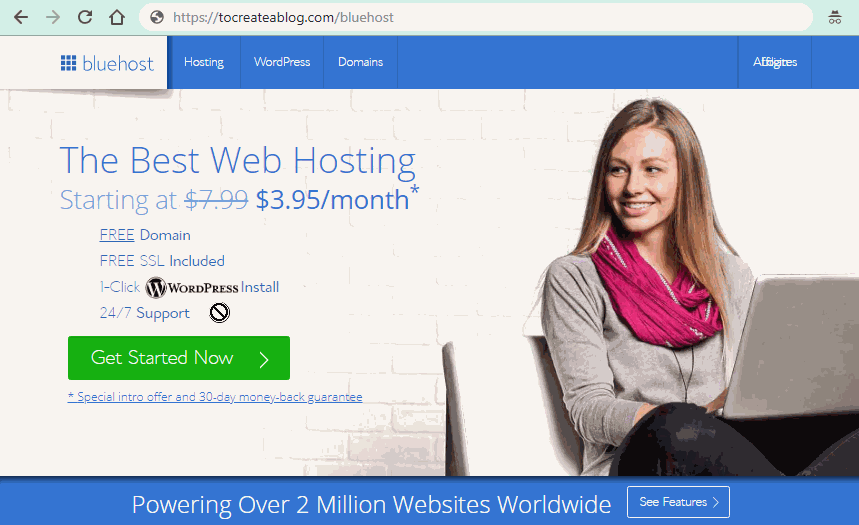
6.1.1 Bluehost shared hosting
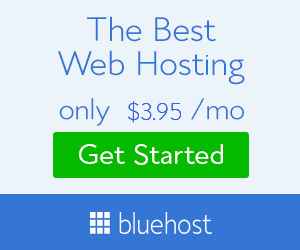
Starting from $3.95/month, You get a free custom .com, org, .net domain name, free SSL certificate and 1-click WordPress installation.
6.1.2 Namecheap shared hosting
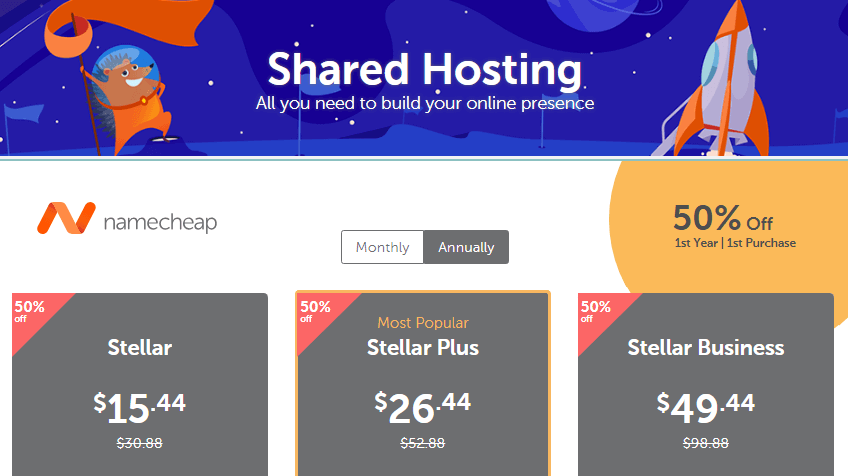
The basic Stellar hosting plan is starting from $30.88/year. But you don’t get a free domain name and SSL certificate costs $1.88 for the first year.
6.1.3 Problem with Shared Hosting services
Even though shared hosting plans are cheap and affordable but they are not good for your blog business reputation.
In the long run, your blog and business will suffer. Security and downtime is a big issue with shared hosting services.
Downtime means, your website won’t be accessible for few minutes or in worst case for hours.
If you are low on budget, start with a shared hosting service like Bluehost and once your blog starts making money, migrate your blog to managed hosting provider like Kinsta.
6.2. Managed WordPress Hosting
6.2.1 What is Managed WordPress Hosting
The Managed WordPress hosting is an extension of dedicated hosting, whereby the required hardware is completely tailored to run WordPress. You don’t share your hosting server resources with others.
Managed WordPress hosting is highly recommended to setup super fast and 24/7 accessible WordPress websites and blogs.
Managed WordPress hosting is a bit expensive than shared hosting service but you get more features, security, and speed.
If you want to learn more about Managed Hosting, You can read Top 9 Reasons to Choose Managed WordPress Hosting.
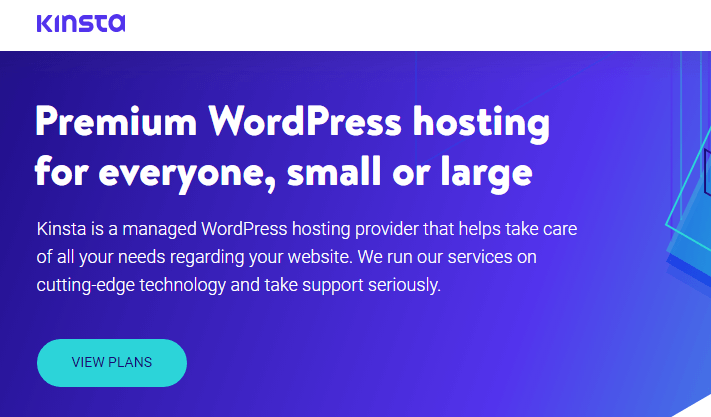
6.2.2 Kinsta – Managed Hosting
Kinsta is one the very popular Managed WordPress hosting provider. They have been offering WordPress services for more than 10 years.
Shared hosting services do not offer most of these services.
- Quick customer supper to resolve issues
- Single dashboard to setup and manage multiple websites
- Automatic backups and scaling
- Global servers for fast websites
- Staging areas to setup and test site before going live
- WP-CLI, SSH, Git, and other developer-friendly options
Kinsta is offering different types of plans for small and large scale blogs and websites. You can start with their basic plan to use WordPress.
7. How to install WordPress?
Once you have registered a domain name and hosting, You can install WordPress. The WordPress Installation process is simple and easy.
Both BlueHost and Kinsta offer 1-click WordPress installation tools.
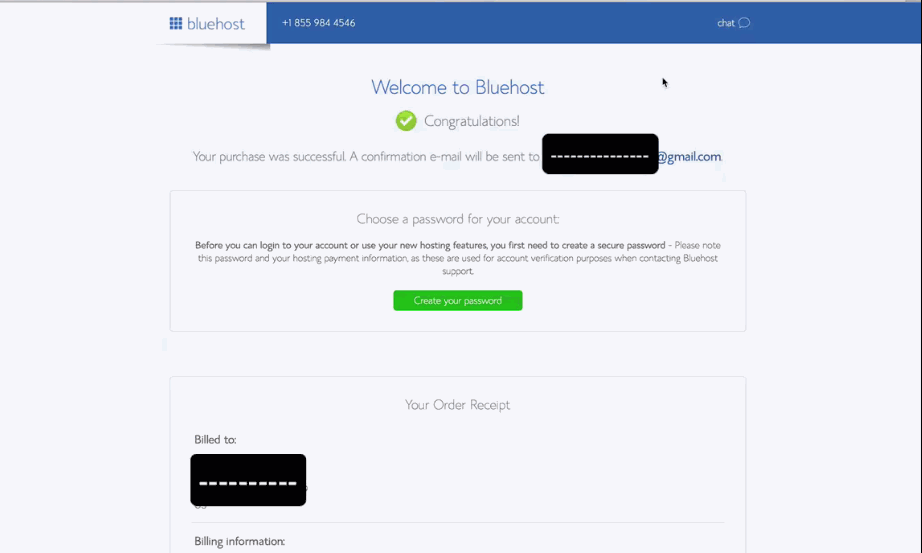
7.1 How to Install WordPress on BlueHost?
It is
You can select from the 3 available plans. With the basic plan, You can only create 1 WordPress website. Choice and Choice plus plans allow you to host multiple websites with unlimited email accounts, email storage and sub domains.
Now add your account info and complete the payment information. Login to your blue host account to create a new WordPress site.
Choose a theme from the list and Bluehost will set up your new website in a minute. You can always change your theme.
Once Setup is complete, You can access your WordPress Dashboard to manage all your website content.
7.2 How to Install WordPress on Kinsta?
Go to Kinsta and sign up for hosting plan. You will receive login details in your email inbox. Login to Kinsta Dashboard to create, and manage all of your websites.
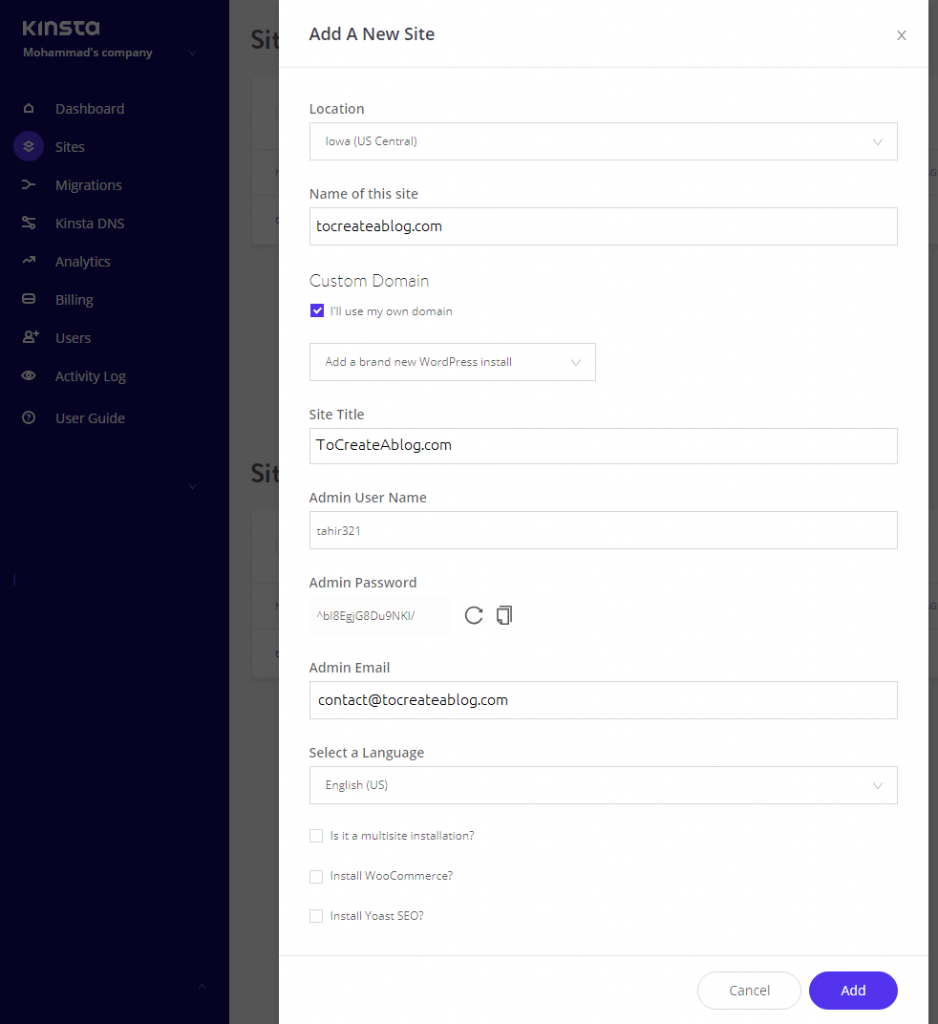
WordPress is pre-installed on Kinsta, To use WordPress on Kinsta hosting, you need to provide the basic details for your new site and Kinsta will set up a new website in a few seconds.
From the Kinsta Dashboard, Go to sites and click Add Site button. A popup screen will appear.
Choose the data-center location and enter your domain name, site title, email address to manage your new blog, language for your website (Yes, WordPress is available in so many languages.)
And your new website will be ready in a minute or two.
8. How to Set up new WordPress site?
Once you have installed WordPress, You can use it to manage all the content on your website or blog.
8.1 WordPress Backend or Dashboard
The backend of your WordPress installation is called Dashboard. In the WordPress Dashboard, You can create, edit, and delete content.
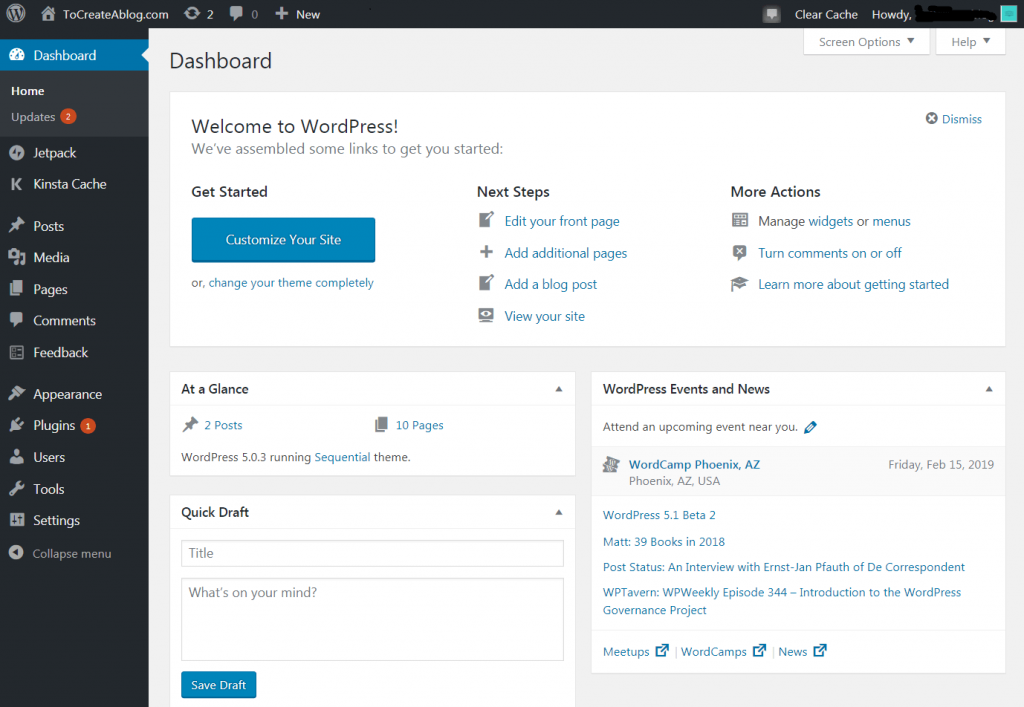
In the screenshot above, You can see how WordPress Dashboard looks.
Only you or other registered users can access the WordPress Dashboard. WordPress has different user roles and each user-role has some limitations.
A user with Administrator user-role have the full-control over WordPress site, they can even delete all the data on your site. While a user with the subscriber role can manage his profile only.
As an administrator. You can upload, install, uninstall and edit the posts, pages, Media files, Plugins, and Themes.
8.2 How to access the WordPress Dashboard or Login Page?
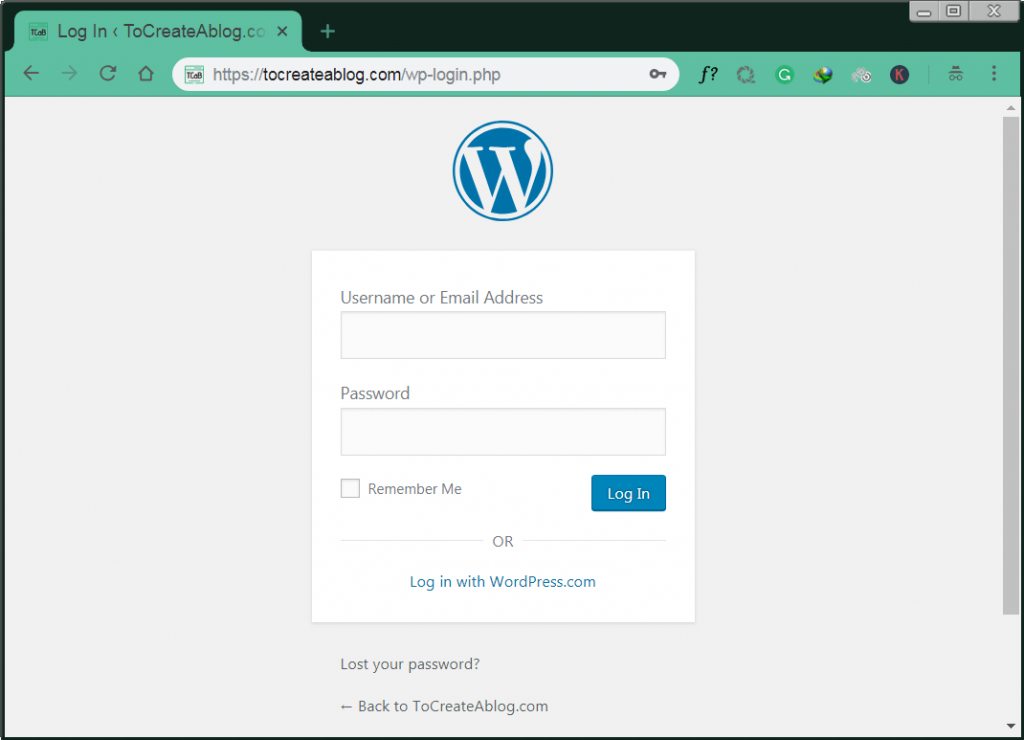
There are different ways access WordPress login page.
- Many themes add a widget on the front end side, You can click the login link to access the login page.
- Type yoursite.com/wp-login.php and enter your email/username and password to access WordPress Dashboard.
- Type yoursite.com/wp-admin to access the login page.
8.3 WordPress Frontend
Once your WordPress installation is complete, You and other people can see the frontend of your site by typing yoursite.com in the browser.
By default, WordPress displays the latest blogs posts on the front end of your website. Newest posts are displayed at the top. The reason is simple, because WordPress was started as a blogging tool.
But you can change this setting and set a static page as the front of your website. When someone visits the frontpage of our blog, they see this page. We have added a link in the header menu to access our blog.
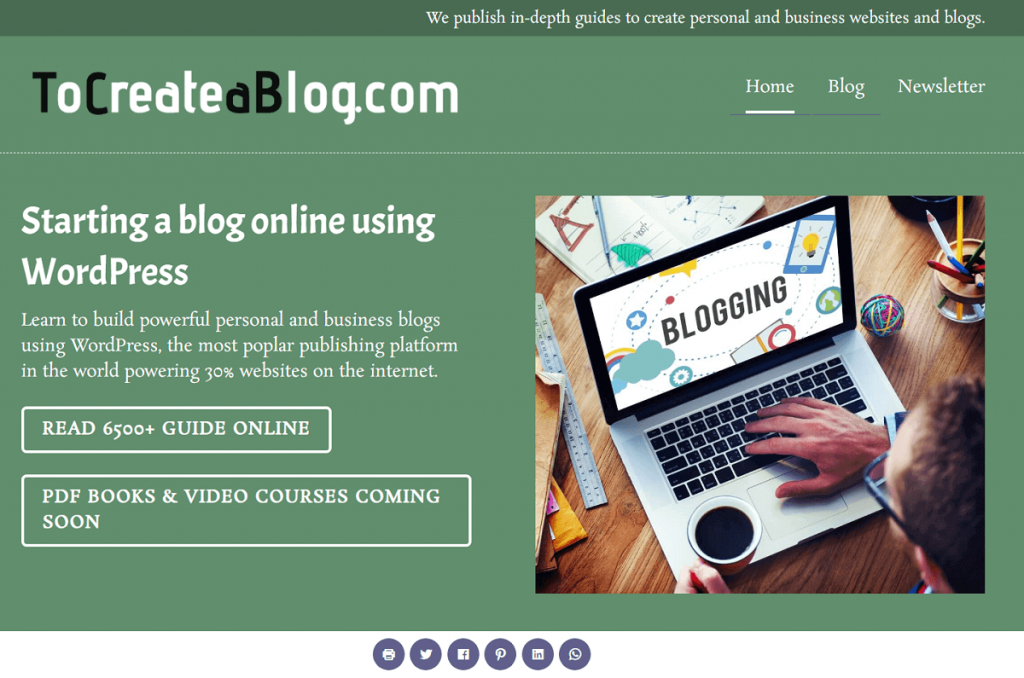
In the screenshot above, You can see the frontend of our WordPress blog. When you set up a new WordPress website, Your frontend won’t look like this because WordPress comes with 3 pre-installed themes. Each theme has a different design.
We have customized the design with a custom WordPress theme.
You can change the design of your blog or website very easily with a WordPress theme to make it look unique.
8.4 The Basics of WordPress Dashboard
Once you are logged in to your new WordPress site, you need to change some best settings. Now we are going to discuss all these settings.
WordPress Toolbar: The Toolbar is an area of the screen just below the browser address bar that lists useful administration screen links such as add a new post, page, user or edit your profile and links to WordPress.org documentation and forums.
Screen Options: can be found on the top-right corner of your screen just below the username.

Welcome to WordPress, At a Glance and Quick Draft are few modules, you see by default. You can hide/unhide these modules with Screen options.
Screen Options allow you to decide what fields or modules are presented in the work area for a given Administration Screen. Each Screen may have a different set of Screen Options.
8.5 WordPress Administration Menus
On the left-hand side, you can see the WordPress menu with primary links to manage the content. When you hover your mouse over any links, You can see more links.
Posts Menu has 4 sub-links: All posts, New posts, Categories, and Tags. From this menu, You can create, edit, delete all the articles on your blog.
Appearance Menu contains 7 more links. You can create, edit and delete widgets, menus, and themes.
Plugins Menu: You will be using this often to install and update plugins to add different type features to your site.
Settings Menu contains links to some important settings page. By using this menu, You can change the privacy, permalinks, comments, reading and other settings.
You can read about all the WordPress Administration_Screens options at WordPress Codex page.
8.6 Essential WordPress Settings
Once, You access your WordPress Dashboard for the first time, You need to change some settings to make WordPress suitable for your business and blog.
- Go to Posts – Categories and rename default category (Uncategorized) to something that suits your business.
- Delete default posts and pages. Create welcome post, about, and contact page.
- Go to Appearance – Customize – Site Identity. Add site title, tagline, logo, and icon.
- Create Menu and add contact, about pages to the primary menu.
- Go to Settings – General page and update the TimeZone and site Language.
- From the Settings – Writing page, set a default category for new blog posts.
- From the Readings settings page, make sure Search Engine Visibility is unchecked, otherwise, Google and other search engines won’t display your site in the search results. If you don’t want to display the latest articles on the front page, Set static page as home page. Create a blank page and name it blog and set it as Posts page.
- Go to Settings – Permalinks and set Posts name as permalink structure.
- Go to Pages and edit and update Privacy policy page.
That’s all for basic WordPress settings. Your site is almost ready. Let’s learn about other WordPress features.
9. How to use WordPress Themes?
Are used to change the design of your website. A theme is a collection of different files. You can create a theme yourself or get a theme from many marketplaces.
WordPress.org/themes is the best place to get thousands of free themes. More than 3,878 free themes are available.
A theme can be very simple and lightweight with only a few basic options like default WordPress theme twenty-nineteen or it can have an advanced options page, customization features, and add-ons.
Paid Themes: ElegantThemes and ThemeForest are two very popular stores to buy professional and high-quality WordPress Themes. Divi is the highest selling WordPress theme at ElegantThemes, while Avada and X are best selling themes at ThemeForest with more than 2 million copies sold.
9.1 How to install a WordPress theme?
Login to WordPress Dashboard. Go to Appearance – Themes – Add new. Here you can find hundreds of free themes.
You can filter themes by popularity, upload date, or you can find a theme by name or category.
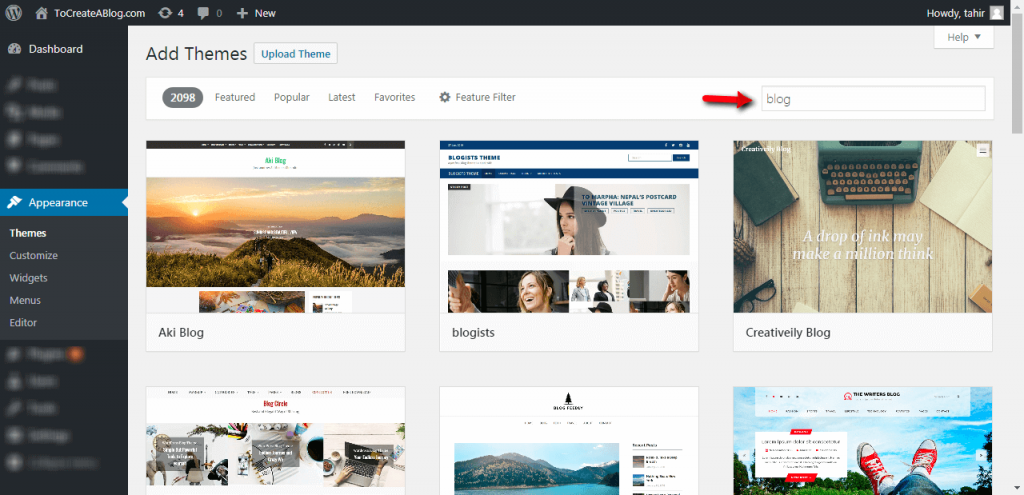
For example, If you type ‘blog’ in the search box, You can see blogging themes.
If you want to use a premium theme, which offers advanced features, design options, and updates, You can upload your theme.
9.2 How to delete a WordPress theme?
Go to Appearance – Themes to see all installed themes. Hover your mouse on any theme and click the Theme Details button.
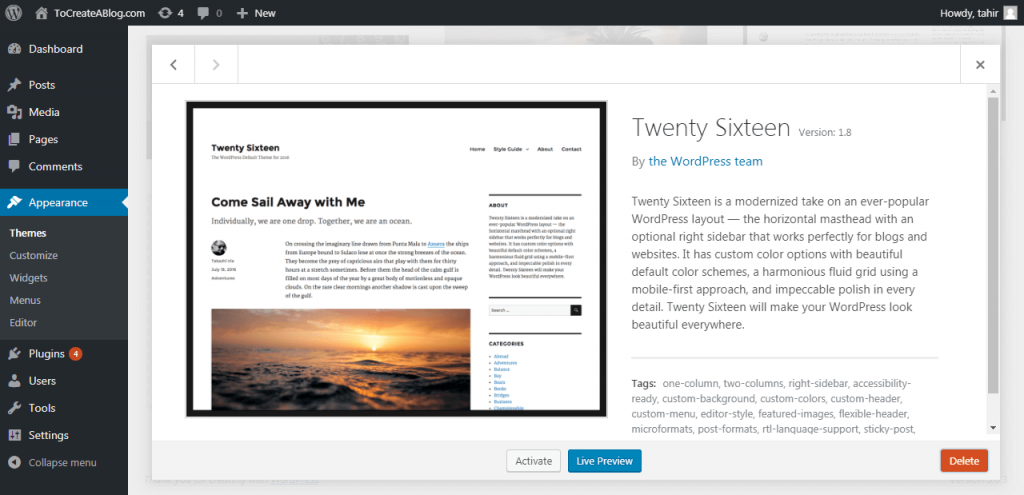
Now, You can see 3 options.
- Activate
- Live Preview
- Delete
Just click on the Delete button and confirm. That’s all
9.3 How to update a WordPress theme?
WordPress theme developers release new updates every so often. The purpose of a theme update is to fix the security issues, add new features and delete deprecated features.
There are two ways to update a theme. Go to Appearance – Themes, If an update is available, You will see an update notification.
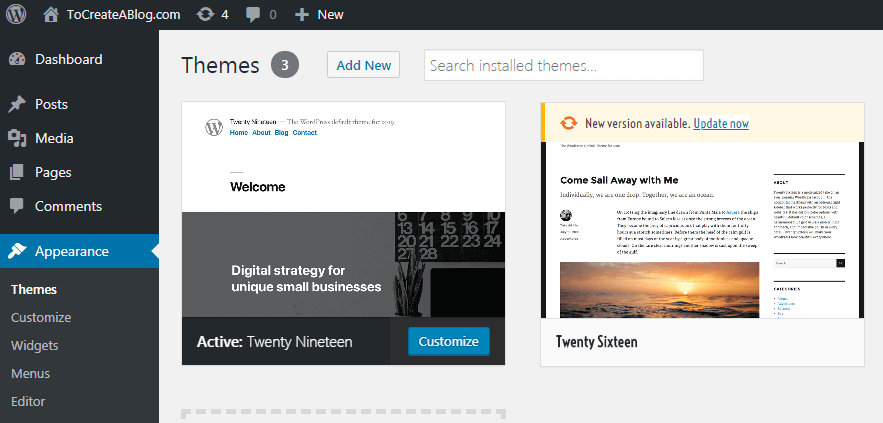
Just click on Update Now link and Your theme will be updated automatically. If you are using a premium theme, You might need to install a plugin to see if an update is available.
9.4 How to customize your site with a Theme?
After installing and activating your theme, go to Appearance – Customize. You will see the following screen.
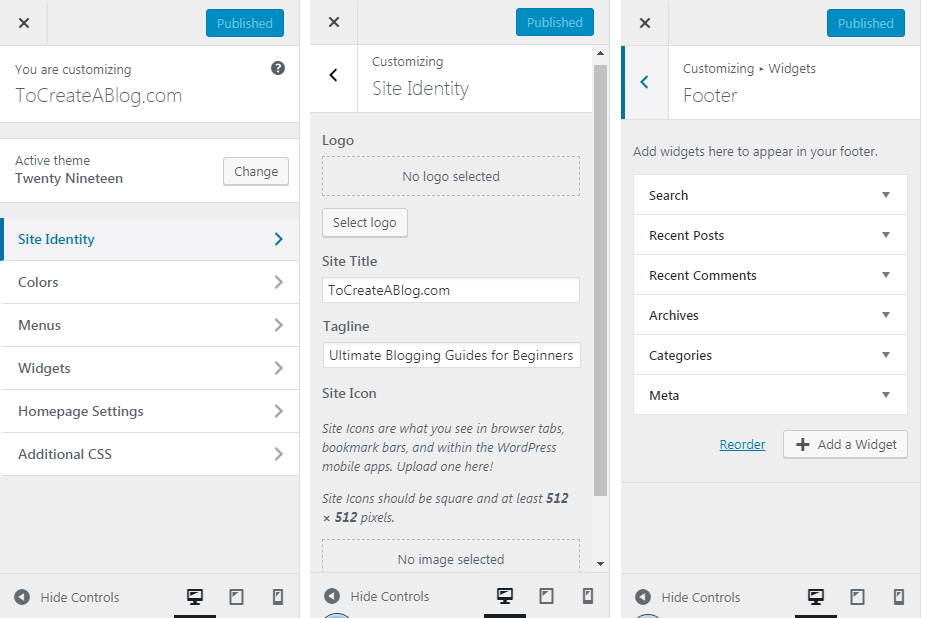
On the left-hand side, You can see different options. When you click on each menu item, hidden options will be revealed.
Simply change any of these settings, and WordPress will display the live preview of changes.
Some themes have single widget area, while others can have multiple widgets areas. In the above screenshot, our theme has a single widget area the footer area, It means, You can display any of the 6 available widgets.
When you will install a new plugin such as JetPack, You will have the option to add more widgets to the widget areas.
10. How to use WordPress plugins?
Are used to add additional functionality to your website. Such as social media sharing buttons, email signup forms, discussion forums, e-commerce features and more.
A WordPress plugins turn your basic WordPress installation into power-house. With plugins, You can create eCommerce, social networking, online discussion forums, photo sharing and many other type of websites.
Thousands of free plugins are available at WordPress.org/plugins. While premium plugins are also available by third-party developers. CodeCanyon is one of the best place to download 6800+ premium WordPress plugins.
If you are going to build an online store with WordPress and WooCommerce, then Woocommerce extensions store is the best place to start.
Jetpack is one of the most widely used free plugins to add a different type of essential features to WordPress sites. This plugin is created by WordPress.com team. This plugin connects your site to WordPress.com account and lets you manage site security, backups, social media account and more very easily.
All in one SEO is a very popular search engine optimization plugin for WordPress. As a blogger and website owner, You can not ignore Google and other search engines. This plugin guides to optimize content for higher rankings in search results.
WooCommerce is the most popular and widely used free plugin to turn a simple WordPress site into a powerful online store. WooCommerce powers over 28% of all online stores.
10.1 How to install a WordPress plugin?
Now, You know where to get WordPress plugins, let learn how to install a WordPress Plugin.
Go to Plugins – Add New. From this screen, You can search, browse and install free plugins available in the WordPress plugin directory.
You can click the Upload plugin button to install a premium or free plugin, you downloaded from any other marketplace.
10.2 How to Activate, Deactivate, Update WordPress plugins?
Go to Plugins – Installed plugin page to view all plugin. From this page, You can activate, deactivate, and update your plugins.
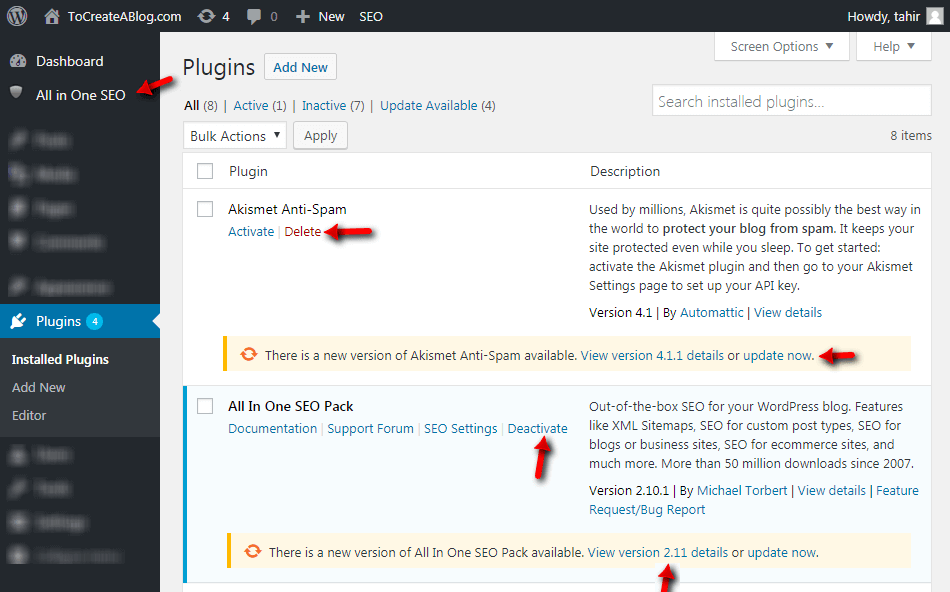
You can also see the basic details about installed plugins, version number, links to developer website and documentation.
Don’t update WordPress plugins blindly, must-read new version details and make sure to backup our website before updating WordPress core, plugins and themes.
Because sometimes an update can break your website and you might lose all of your website data. Regular Backups with Jetpack or any other backup plugin can help you to avoid these problems.
11. WordPress Posts and Pages
WordPress has two default content types.
Posts in WordPress: or you can call it articles as well, are entries that display in reverse order (newer first) on your WordPress home page. Posts usually have comments fields beneath them and are included in your site’s RSS feed. Read more about Posts at https://codex.wordpress.org/Posts.
Posts are displayed in your blog section but pages are not included in blog post lists.
Pages in WordPress: are generally for non-chronological, hierarchical content. You use pages for information that does not change often. Like “About” or “Contact” would be common examples.
Unlike posts, WordPress does not list pages by date and you can categorize or tag them like WordPress posts.
But you can create as many post types as you like With WordPress custom post types feature.
For example, when you Install WooCommerce plugin to sell products online, WooCommerce will allow you to add new products to your store with products post type.
12. How to write a blog post and page in WordPress?
Writing content is very simple and easy with WordPress. You can go to Posts – Add new to write a new blog post and a visual editor called Gutenberg lets you easily format your content.
Writing quality content is important, We recommend you to read 22 Actionable Writing Tips before start writing content.
WordPress 5 introduced the very powerful visual editor Gutenberg. It is a visual page builder for WordPress, much more powerful than the previous code and visual editor.
To create a new blog post, Go to Posts – Add New. You will see this visual editor. If you want to use the code editor, on the right-hand side of the screen click on the . doted sign beside the setting wheel and select Code Editor.
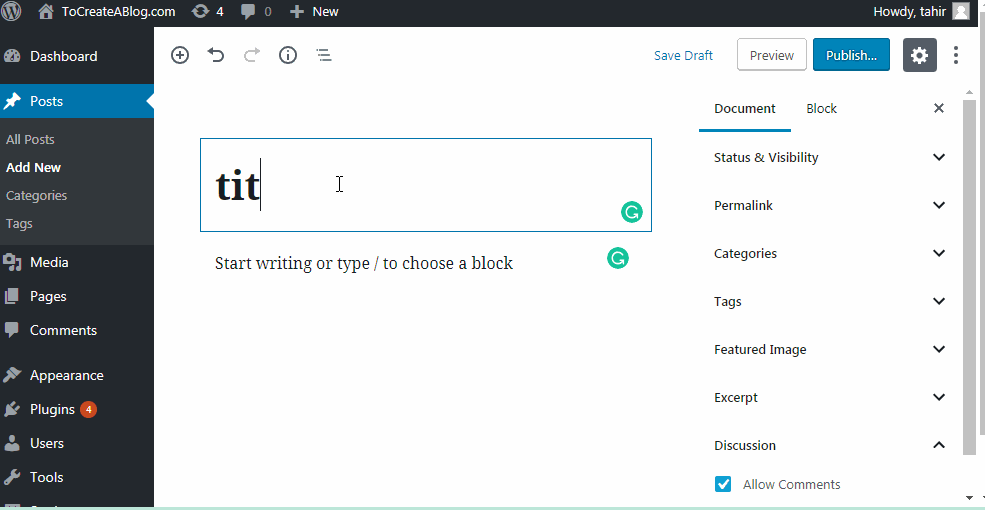
Write a catchy post title for your blog post, it is the first thing your reader will read. You can read 180 Catchy Headlines Examples which also discuss 18 Headline Tools for Engaging Post Titles.
Click on the + symbol to reveal the hidden content block menu. Now click on Common blocks and select a block you want to use.
You have the following options in the Common Block section.
- Paragraph
- Heading
- Image
- Gallery
- List
- Quote
- Audio
- Cover and File
If you need to add code, custom HTML or table, click on Formatting section. You can even add multiple columns with the COlumns block available under the Layout Elements.
You can also search for a block such as video, audio, image etc.
Once you are done writing, Click on the Status and Visibility, select from the 3 visibility settings. Public, Private and Password protected.
Click on the post format button to see available options. Each post format has different styling. It means, your post look different. You can preview your post to see how each post format looks.
Next, You need to choose a category for your post and don’t forget to add some relevant tags.
Featured Image is a very important part of each blog post. Your readers and social media users such as Twitter and Facebook user will see this image with the post title and post excerpt on their timeline. So add a high-quality featured image.
Pablo is a free service to create beautiful images for blogs posts and social media.
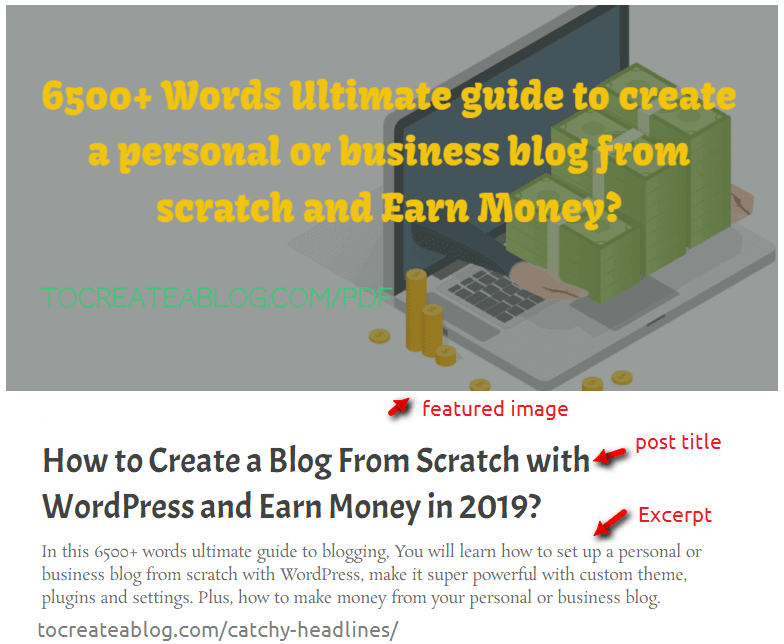
WordPress Post Excerpt is the short summary for your lengthy blog post. It is optional but helps your readers to understand what they can expect in the full blog post.
Normally comments are enabled on blog posts, so your blog readers can share their views about your awesome blog post. If you don’t want to allow comments on specific post, uncheck the Allow comments under the Discussion section.
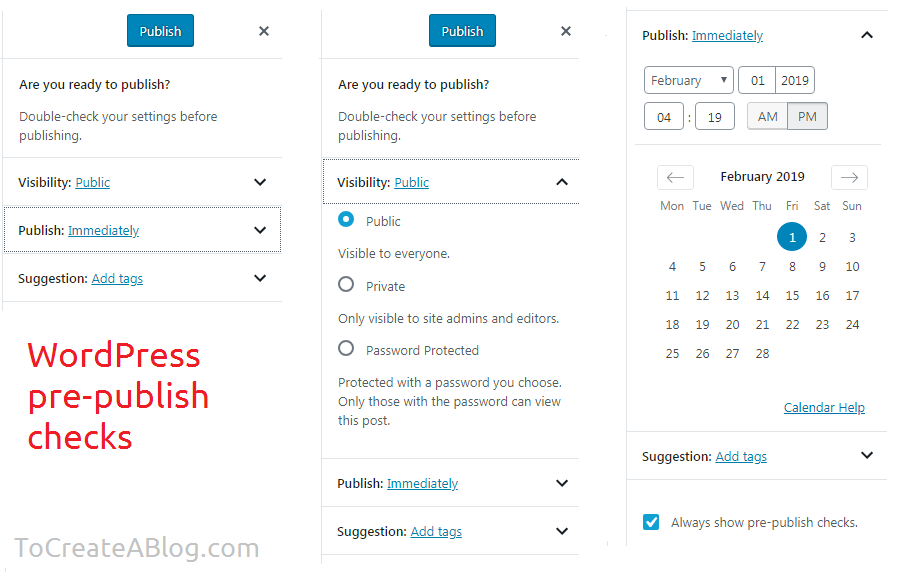
Once your blog post is complete, Hit the Publish button, WordPress will ask you if you are ready to publish?
From this screen, You can choose visibility settings, schedule you to publish later and add few tags. Hit the Publish button and your post will be live on your blog.
Now share your post with email subscribers and social media followers.
13. Pages in WordPress
Use Pages for information that does not need to change/update so often. Such as About, Contact, Privacy, newsletter pages.
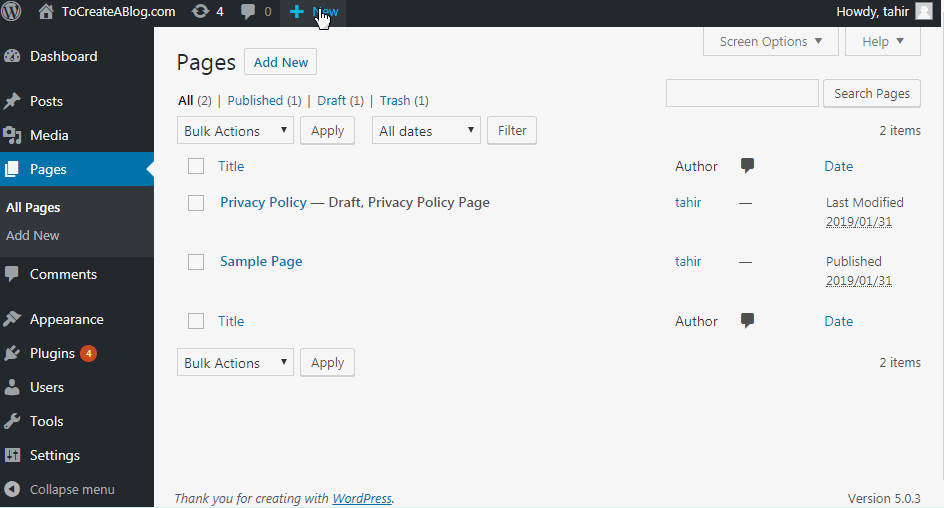
From the Pages screen, You can view a list of all pages on your website. With the Screen Options menu, You can show or hide Author, Comments, Date, and Number of pages to be displayed on a single screen.
If you hover your mouse on a page title, You can see 4 option Edit, Quick Edit, Trash and Preview.
Pages have an extra Page Attribute option, which lets you choose a temple from the available page templates and You can also select the parent page of the new page.
Page Templates: Each theme has different page Templates, As shown in the above gif, I have 4 page templates. Default, Full-width, Grid, and Frontpage. Your theme might have less or more page templates.
Parent Pages is great when you have multiple pages. For example, You can create 3 pages. About, Team, Company History and set About as the parent page for Team and Company History.
Pages are not displayed on the front end of your blog posts automatically like Posts. So don’t forget to create a menu and add links to menus.
14. How to Create Menus in WordPress?
Once you have created few posts and page, You can create a navigation menu so people can easily access important pages on your website.
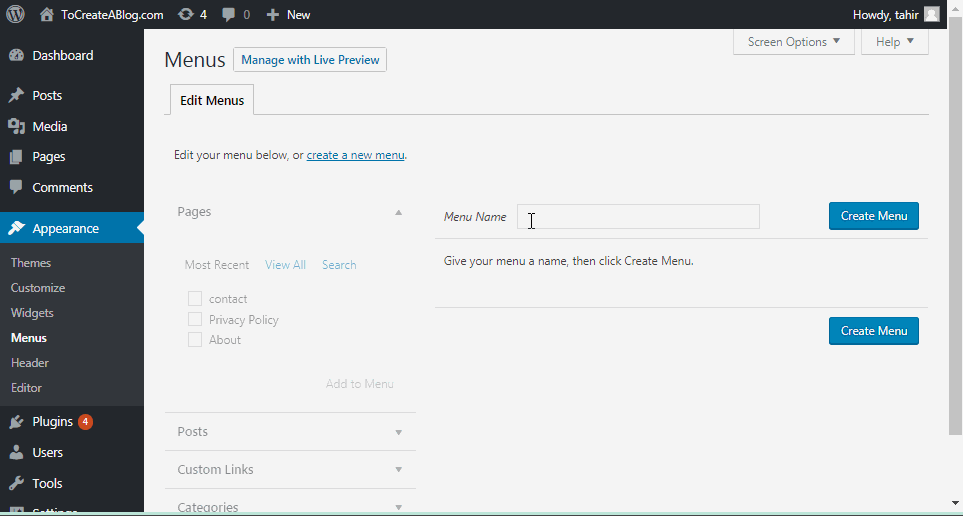
Go to Appearance -Menus and click Create a New Menu button. Add a name such as Header Menu, Footer Menu or Sidebar Menu and add links to your new menu.
You can drag and drop a link to change its location or make it a dropdown menu.
You can add Pages, Posts, Custom Links and Categories to a WordPress Menu. Normally contact, blog, newsletter pages are added to a header menu and privacy, and other less important pages are added to a footer menu.
From the Menu Settings, select a Display Location for the new menu and Save Menu.
15. How to Create a Static Front Page in WordPress?
By default, WordPress shows your most recent posts in reverse chronological order on the front page of your site. Many WordPress users want a static front page or splash page as the front page instead. This “static front page” look is common for users desiring static or welcoming information on the front page of the site.
WordPress Codex
The look and feel of the front page of your website will be based upon the choices of you combined with the features and options of your WordPress Theme.
To set a static front-page, You need to create two new pages and publish them as publically.
Home Page: Create a new page add all the information you want to display on your website homepage and save it as Home. You can use any name Home is not required.
Blog Page: Create a new blank page and name it blog and publish it.
Now go to Settings – Reading. Click A Static Page and set Home as the Homepage and Blog as the posts page.
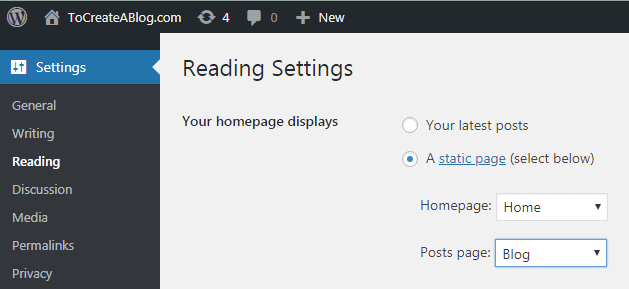
Save your changes and visit the frontpage of your website to make sure you have set the correct page as the front page.
16. Turn Basic WordPress Installation into a powerful website with Plugins
When you create a new site with WordPress, you will be missing a lot of necessary features such as
- Social media sharing buttons
- comments spam blocking
- Faster image loading
- Regular backups
- Email list building
- Automated security scans,
- Search Engine Optimization
- Online Store
- PayPal payments features
and many other features.
Dozens of free and paid plugins are available for each of the above-mentioned features.
You might not need all of the above-mentioned features for your website that’s why WordPress lets you use Plugins of your choice to add only required features.
16.1 Jetpack – The ultimate WordPress Plugin
This is one of the most widely used free plugins with paid features created by WordPress developers.
JetPack has all the necessary features, You need to build powerful WordPress websites.
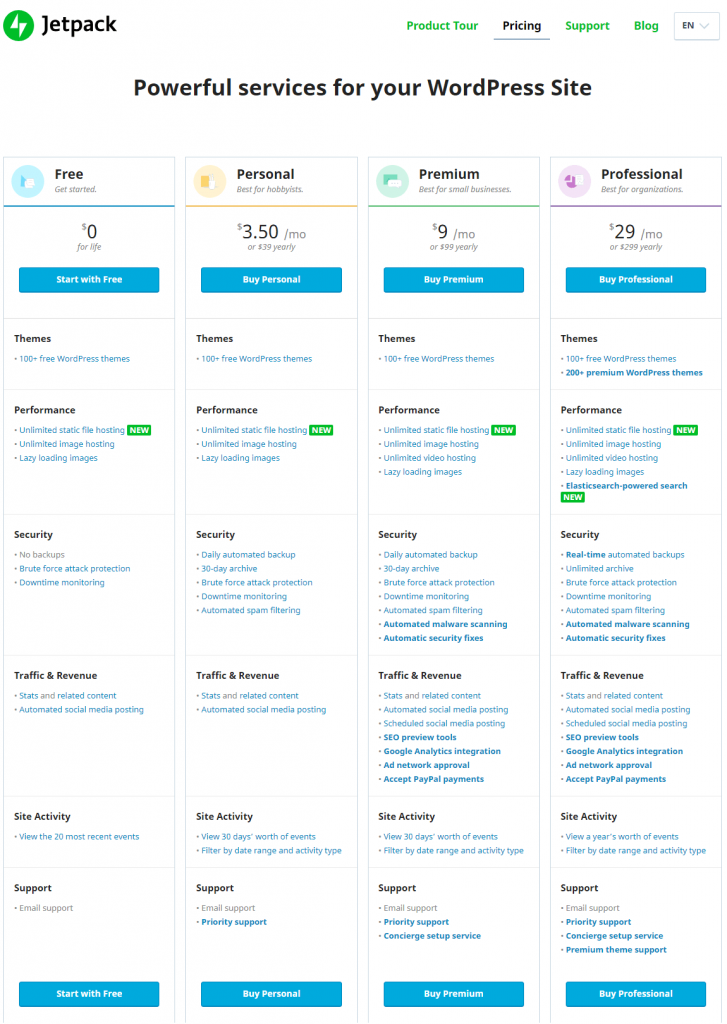
Here is a list of all the Jetpack premium features.
- 100+ free WordPress themes
- 200+ premium WordPress themes
- Unlimited static file hosting NEW
- Unlimited image hosting
- Unlimited video hosting
- Lazy loading images
- Elasticsearch-powered search NEW
- Real-time automated backups
- Unlimited archive
- Brute force attack protection
- Downtime monitoring
- Automated spam filtering
- Automated malware scanning
- Automatic security fixes
- Stats and related content
- Automated social media posting
- Scheduled social media posting
- SEO preview tools
- Google Analytics integration
- Ad network approval
- Accept PayPal payments
- View a year’s worth of events
- Filter by date range and activity type
- Email support
- Priority support
- Concierge setup service
- Premium theme support
JetPack is a free plugin but you can start with the very affordable Jetpack Personal plan which offers following premium features.
- Daily automated backup
- 30-day archive
- Brute force attack protection
- Downtime monitoring
- Automated spam filtering
- Priority support
And many other features.
JetPack free plan offers the following features
- 100+ free WordPress themes
- Unlimited static file and Image hosting
- Lazy loading images
- Brute force attack protection
- Downtime monitoring
- Stats and related posts
- Automated social media posting
16.2 WordPress and Search Engine Optimization Plugins
Jetpack free plan offers basic SEO features such as Google, and Bing verification and XML sitemaps submission.
Advanced JetPack SEO features are available for Premium plan users starting at $9/month which is very affordable.
The great thing is that with the premium plan you also get unlimited video hosting, Automatic security fixes, Google Analytics integration, Ad network approval, and PayPal payments feature.
With JetPack Ad network approval You can make money by displaying ads on your website.
With JetPack SEO feature, You can customize how your blog post and page titles appear for your site.
Create a front page, individual posts, and pages meta description without touching your site code.
You can also see live previews of how Google, Facebook, Twitter, and WordPress.com will display your content.
You can also submit your site URL and XML sitemaps to Google and Bing and verify your website with many popular search engines and services.
16.3 Free WordPress SEO Plugins
All in One SEO Pack has 2+ million active installation the basic plugin is free like Jetpack but you can upgrade to the premium plan for advanced features.
Yoast SEO has 5+ million active installation, which makes it the most popular free SEO plugin. This plugin also has paid features.
16.4 Free WordPress Backup Plugins
Jetpack daily backups plan costs you $3.50 a month, but if you don’t want to spend money, You can use free plugins to backup your website.
UpdraftPlus and BackwpUp are popular free backup plugins for WordPress. Both of these free plugins offer a paid version to unlock many more essential features.
17. How to Create different types of websites with WordPress?
Basically, WordPress is a publishing platform but it is possible to create different types of websites with WordPress. You don’t need to be a developer to do this. WordPress plugins are available to do this.
Let’s see what type of website, you can create with WordPress plugins.
- Online stores
- Forums
- Social networking or community sites
- Portfolios
- News/magazine sites
- Job Boards
- Business Directory
- Question and Answer Website
- Gallery/Photography
- Private Blog/Website
- Multilingual Websites
- Wiki
- Classified Ad Websites
- Membership
- Real Estate
- Online Courses
And many other types of websites can be created with WordPress plugins and themes.
You can Google the specific term to get a list of available themes and plugins for your website.
Here are a few popular plugins to build websites with WordPress.
WooCommerce: is the most popular free eCommerce plugin to create online stores and start selling your products.
bbPress is the official free plugin to create online discussion forums with WordPress. Matt Mullenweg the WordPress founder is a contributor to develop this plugin.
BuddyPress lets to create websites like Facebook and lets Members to register on your site to create user profiles, have private conversations, make social connections, create and interact in groups, and much more.
WP Job Manager has 100,000+ active installations to Manage job listings from the WordPress admin panel and allow users to post job listings directly to your site.
AWPCP – Classifieds Plugin let to create ads section to WordPress. Great for increasing retention to your site, adding revenue for your business, and creating customer interaction.
Business Directory: GeoDirectory is a popular free plugin to build huge location-based business directories with this fully-featured directory plugin. In a few clicks, you could be the next Yelp or Tripadvisor.
Membership websites: are used to restrict premium content, create custom registration fields, and more. WordPress has many paid and free membership plugins.
There are so many powerful themes are also available to create specific type of websites with WordPress. Those niche themes are developed to create special websites.
Final Words
That’s all for this ultimate guide, which explains everything in detail to use WordPress to build powerful blogs and websites from scratch.
If you have any question, feel free to contact us